BBQ Chicken: From Grill to Table in Minutes
When I first tried BBQ chicken, I was afraid of it. Upon encountering the grill, I experienced a surge of anxiety, uncertain if my dish would turn out undercooked or crisp. Years later, I want to share the proven methods I discovered that resulted in scrumptious, juicy BBQ chicken that was irresistible even to the harshest food critic—my dad!
Table of Contents
Knowing the Fundamentals: Grilling versus Barbecuing
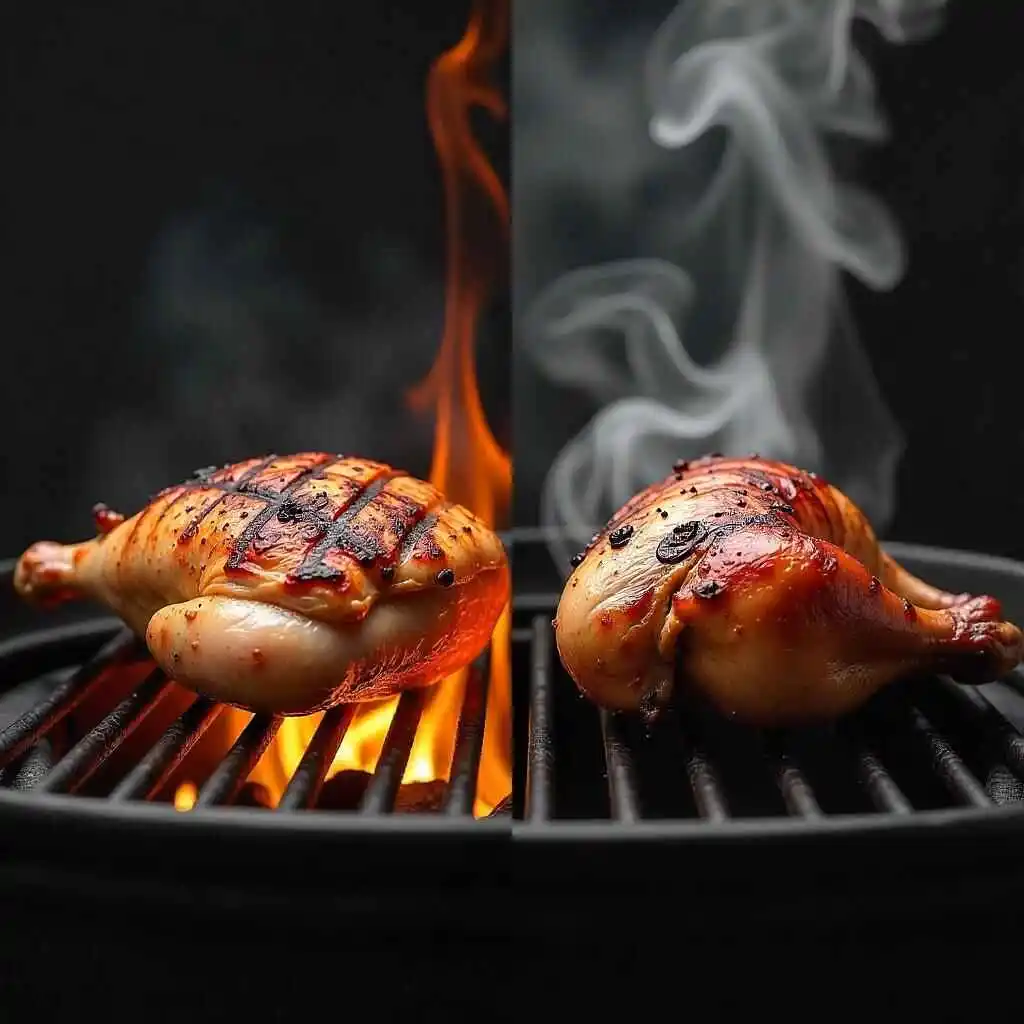
When considering outdoor cooking, two techniques usually spring to mind: grilling and barbecue. But do you know the difference? Let’s dissect it.
1. Grilling: The Quick and Hot Approach
Grilling is all about quickness. It centers on smaller pieces of meat, including chicken breasts, steaks, and burgers. You usually prepare these directly on the grill grates at high heat. Those who wish to whip up a supper quickly may find this approach ideal. See it as a sprint in the gastronomic realm.
- Grilled usually takes a few minutes on each side.
- Perfect cuts are smaller ones, like burgers or chicken breasts.
- Direct heat produces that lovely char and sear.
Ever experimented with grilling a chicken breast? Despite the speed, you must exercise strict attention. Cooking for one minute too long will cause the dish to dry out. One must strike a balance.
2. Barbecuing: The Methodical Approach
On the other hand, barbecues require meticulous preparation. They involve slow-cooking bigger, bone-in chunks of meat, like chicken thighs or ribs, which improves taste and softness. You spend hours cooking these chops at temperatures over indirect heat.
- A slow-cooked dish takes several hours to achieve the ideal softness.
- Perfect cuts are thigh and drumstick bone-in chunks.
- Low Heat: Indirect heat enables even cooking without burning.
Imagine spending hours boiling a whole chicken so the flavors merge. This process is akin to a marathon, where endurance is crucial; patience is the key to success.
3. Important Variations in Methodology
Every technique calls for distinct timing and heating methods. Grilling requires constant attention and quickness. However, barbecuing allows for a more relaxed approach, at least temporarily. Such preparation is essential for obtaining the most fantastic taste and incredible chicken.
“Grilling is for speed, while barbecuing is a labor of love.” – Unknown Cook
Knowing these strategies can significantly help you change your cooking style. For juicy chicken, for example, grilling is the method of choice. However, if time is critical, grilling expedites the process.
So, consider what you want to do next time you light the smoker or grill. Do you want a tasty feast or a fast lunch? Every technique has a place in the culinary arts; recognizing the variations will improve your cooking.
Choosing the Right Chicken
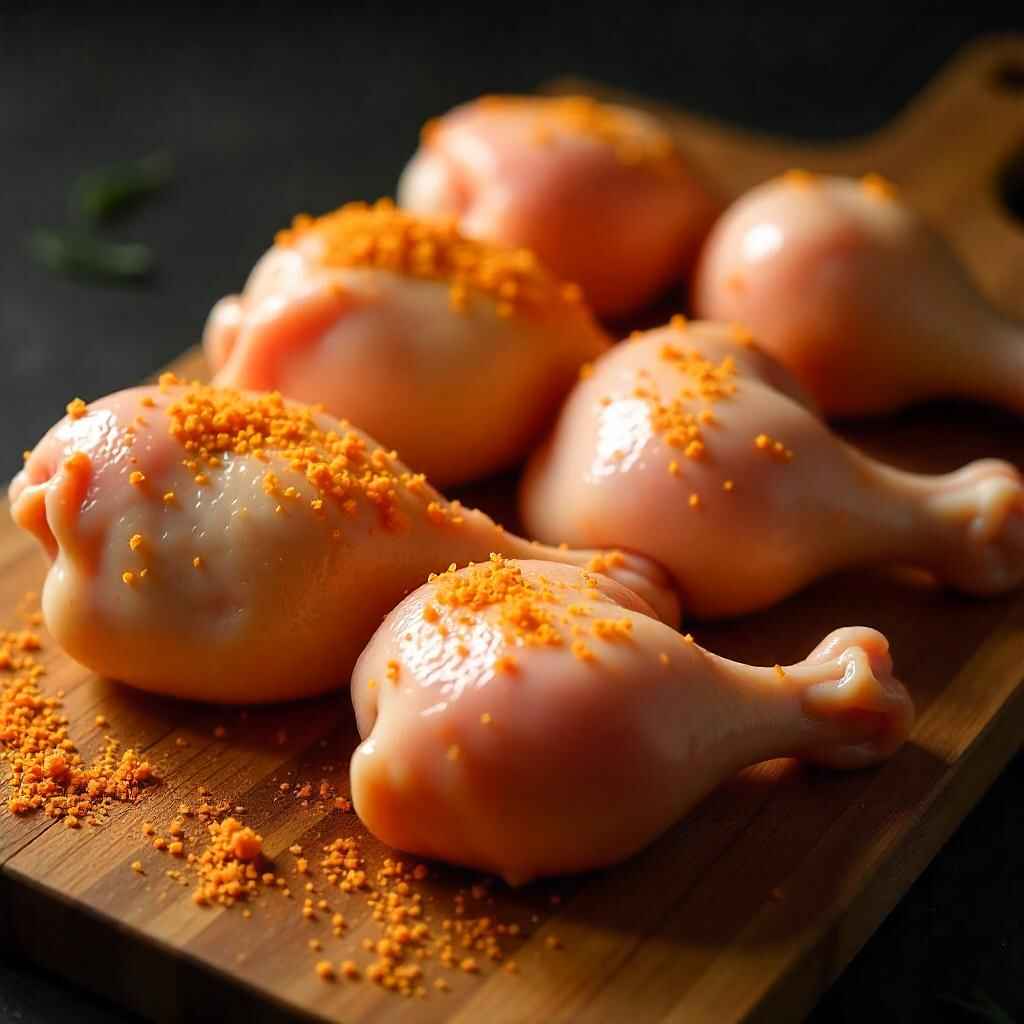
Regarding barbecues, the chicken selection is critical. I usually advise skin-on chicken thighs or drumsticks with bones in them. What then? They have the best juiciness and taste. Let’s explore why your next cookout’s ideal cuts are these ones.
Why Thighs Over Breasts?
Has anyone ever bitten into a dry chicken breast? It is not nice. Thighs are useless. They’re naturally juicier and less likely to dry out when cooking. This advantage makes them perfect for the low-and-slow grilling approach. Their higher fat content keeps them juicy and delicious.
“ALWAYS go with thighs over breasts for juicy chicken.” – BBQ Specialist
My guiding principle is this motto: Thighs and drumsticks are more forgiving when cooking. They can tolerate a rare time on the grill without turning into a rubbery mess.
Selecting the Correct Chicken
When choosing your chicken, give these factors some thought:
- Bone-in, skin-on slices: Essential for flavor. The skin adds texture and helps with moisture retention.
- Preferences particular to species: Search for free-range or organic chicken. These options typically taste better due to their superior growing conditions.
- Quantity: I advise using roughly 3.5 to 4 pounds (1.81 kg) of chicken for a normal BQ. This quantity usually translates to rapproximately12 to 14 pieces, ideal for feeding a gathering.
Cooking Temperature Counts: Let’s
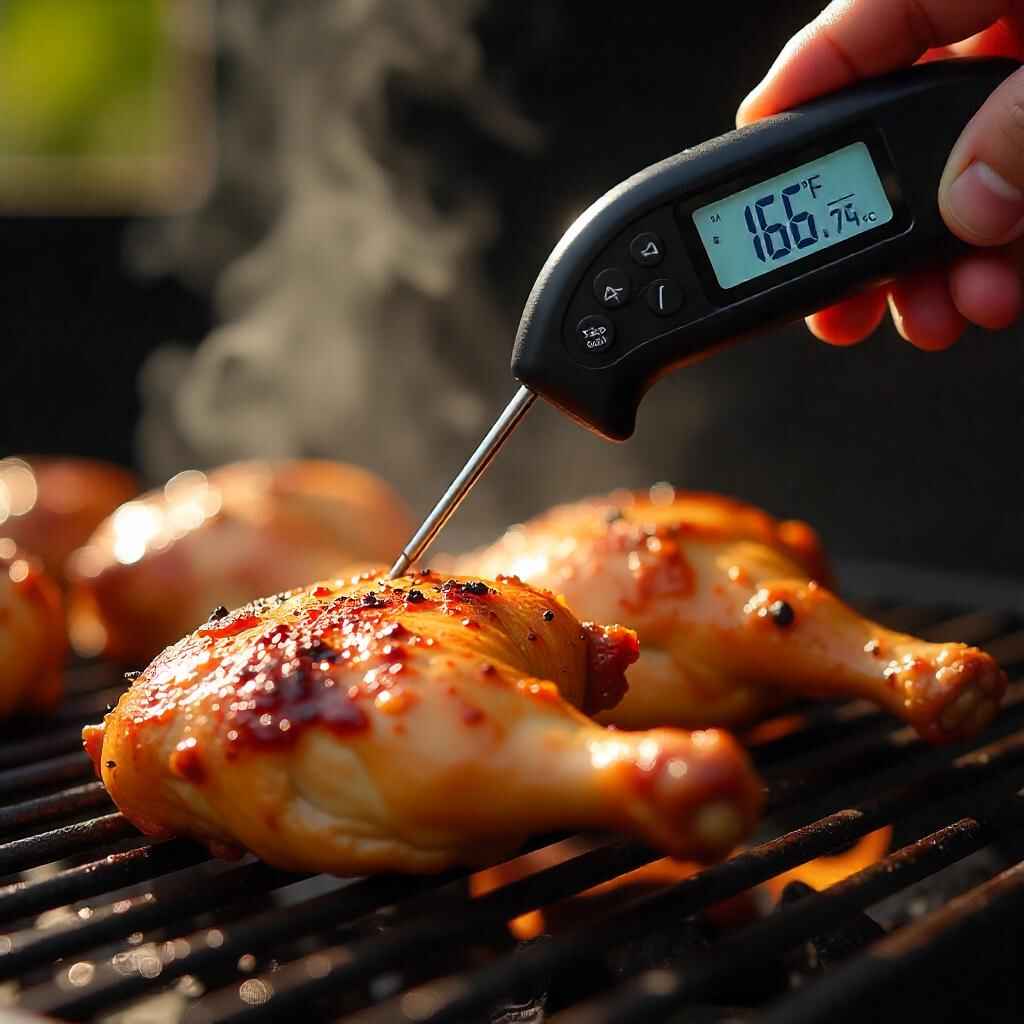
Let’s now discuss cooking temperature. Chicken’s optimum range is 165°F (ca. 74°C). This temperature range guarantees both juicy meat and thorough cooking. An instant-read thermometer changes everything. Cooking loses its guesswork with it.
Excellent BQ chicken depends mostly on patience. Cooking it low and slow will help the flavors develop. The meat should be soft and delicious, and the skin should be crispy.
Basic Instruments for BBQ Success
The right tools can significantly impact BBQ. I have learned this lesson through experience. Try grilling the chicken without a suit. This procedure can lead to undercooked chicken, which is unsafe to eat. So, let’s explore the key instruments you need for a successful BBQ.

1. Thermometer with Instantaneous Readings
We frequently use this instrument to check doneness. Undercooked meat can cause foodborne diseases. An instant-read thermometer brings peace of mind. It can rapidly check your chicken’s internal temperature to guarantee it is safe for consumption. For chicken, try aiming at 165°F (ca. 74°C). Trust me; a decent thermometer is well worth the investment.
2. Silicone Basting Brush
This tool is specifically designed for applying sauces. Silicone brushes shed less than conventional brushes and are easy to clean. You want to ensure that the delicious BBQ sauce stays in your mouth. It is precisely what a good basting brush facilitates. It also lets you regulate your sauce application level. Would you like a thick coating or a light glaze? You are the one choosing here!
3. Long Tongs
They are essential for turning chicken on the grill without piercing the skin. Piercing the skin might let juices escape and result in dry meat. Nobody is in for dried chicken! Your chicken will flip and turn using simple long tongs. A significant benefit is also having your hands away from the heat.
Why Should Tools Matter?
Using the right tools can generally improve the grilling experience. It’s about flavor and cooking accuracy rather than only convenience. Having the correct tools helps you concentrate on what truly counts: savoring the process and the exquisite cuisine.
“Every difference in the kitchen comes from the correct tool.” – Chef
All things considered, never undervalue the influence of effective instruments. Your best BBQ companions are long tongs, a silicone basting brush, and an instant-read thermometer. They guarantee your meal is correctly cooked, tastes excellent, and is safe. So get ready to wow your friends and family at your next BBQ!
Methodical Guide to Grilling BBQ Chicken
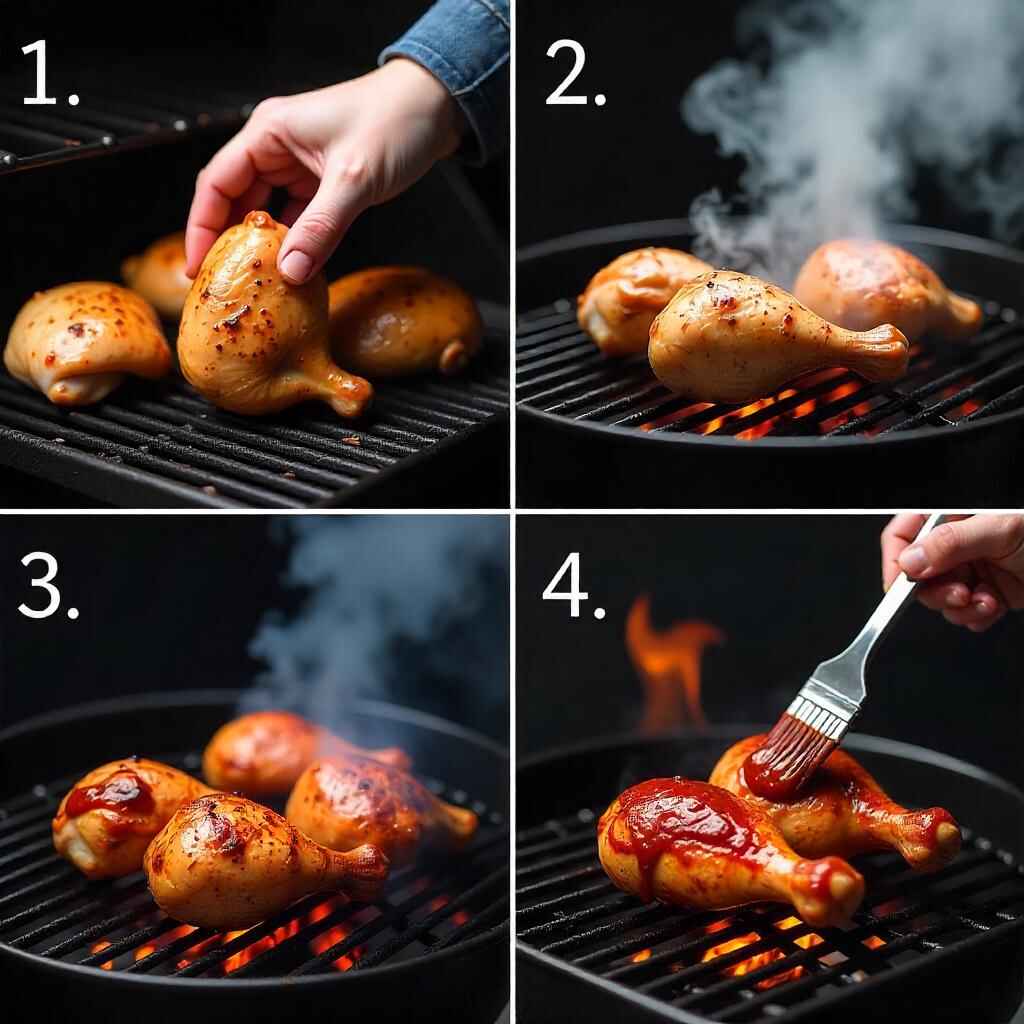
BBQ chicken grilling may be fun, but it’s about creating something great, not just cooking. Let’s explore the processes needed to achieve that ideal BBQ chicken.
1. Prepare the Chicken
Prioritize your first concerns. Pat the chicken dry. This phase is vital. Why? Surface dampness might stop that gorgeous sear we all enjoy. After drying, gently massage the chicken with your preferred dry rub. I suggest blending ack pepper, onion powder, smoked paprika, chili powder, kosher salt, and garlic powder. Get some of that rub under the skin as well. This step drastically improves the taste.
2. Set Up Your Grill
You should use a two-zone arrangement. One side of the grill will be hotter, nd on the other side, the cow will be cooler for indirect heat. EqCookinghicken is also dependent on this arrangement. See it as a cooler side for slow cooking and a hot side for searing. It’s like living in the ideal of both worlds!
3. Cook the Chicken
Place the chicken on the cooler side of the grill. Cover it and let it steam for roughly thirty to thirty-five minutes. Remember to flip it every ten minutes. This procedure guarantees consistent cooking and guards against drying out. Recall that flipping is absent. It’s like giving your chicken a little dance.
4. Stir in the Barbecue Sauce
Apply the BBQ sauce after the chicken has cooked thoroughly. Still, wait! During the final few minutes of cooking, please proceed with this step. This step is necessary because applying the sauce too early can result in burning. Brush the sauce over the chicken; grill for three to four more minutes per side. This approach will provide the glaze we all yearn for—sticky, delicious.
“Good things come to those who wait; patience is essential when barbecues are involved.” – Master Grilling
5. Check for Doneness
Using an instant-read thermometer can ensure precise cooking of your chicken. The interior temperature should be between 170 and 175°F (ca. 79°C). This temperature ensures delicate and juicy chicken. You do not want to serve undercooked chicken!
6. Enjoy Your BBQ Chicken

After cooking, let the chicken rest for a few minutes before presenting it. This procedure lets the juices disperse. Pair it with your favorite sides for a delicious dinner. Share the results of your work!
Advice on Using Leftovers and Storing Them
Following a fantastic BQ, I want nothing except to squander any mouthwatering grilled chicken. Leftovers, especially when kept and reheated correctly, may be delicious, as we know from the original meal. These suggestions will help you ensure BBQ chicken stays safe to eat and tasty

1. Chill Before Refrigerating
Let your grilled chicken cool before refrigerating. This step is crucial. Storing heated chicken could raise your refrigerator’s temperature, encouraging bacterial growth. Moreover, cold preserves the chicken’s texture. Nobody enjoys leftover rubber!
2. Utilize Airtight Containers
Store your leftovers in an airtight container. The lid technique keeps your chicken juicy and stops moisture loss. It also filters unwelcome smells from other refrigerator items. Use glass containers if possible; they’re perfect for reheating and won’t absorb scents.
3. Best Reheating Techniques
Regarding reheating, there are several techniques to take into account:
- Microwave: Simple and quick, but watch not to overindulge. You want to heat it, warm it through.
- Oven: This approach preserves moisture. To prevent the chicken from drying out, preheat the oven to 350°F (ca. 177 °C) and then cover it with foil.
- Air Fryer: My favorite! It keeps the chicken inside moist while giving it crispiness.
4. Secure Storage Period
Your BBQ chicken should be in the refrigerator for four to five days. If you want to keep it longer, consider freezing it. Chickens that are kept correctly frozen can last for up to three months. Just remember to thaw it overnight in the refrigerator before reheating.
5. Savoring Leftover Chicken
Well-kept leftovers can taste excellent even several days after the first grill day. Making BBQ chicken sandwiches the next day brings me utter delight. This is an effortless approach to savor the tastes once more.
“Nothing compares to a good BBQ; day-after BBQ chicken sandwiches come rather close!” – Food Buff
Ultimately, taking time to preserve and reheat your BBQ chicken properly will turn your leftovers into a second dinner worth eating. These ideas will help you savor your grilled chicken days following the BBQ by maintaining the taste and fun factor. Happy dining!
These basic ideas and procedures will help you prepare delightfully juicy BBQ chicken for summer cookouts.